Safari Snapshots: Mastering iPhone Photography in the Wild
Embark on a visual odyssey with ‘Safari Snapshots: Mastering iPhone Photography in the Wild.’ Unlock the secrets of capturing stunning wildlife moments on your iPhone, as I guide you through essential tips and techniques for a truly immersive safari photography experience. Unleash the power of your iPhone camera amidst untamed landscapes and majestic creatures. Start your journey to master the art of wildlife photography today.
Embracing the Power of Your iPhone Camera
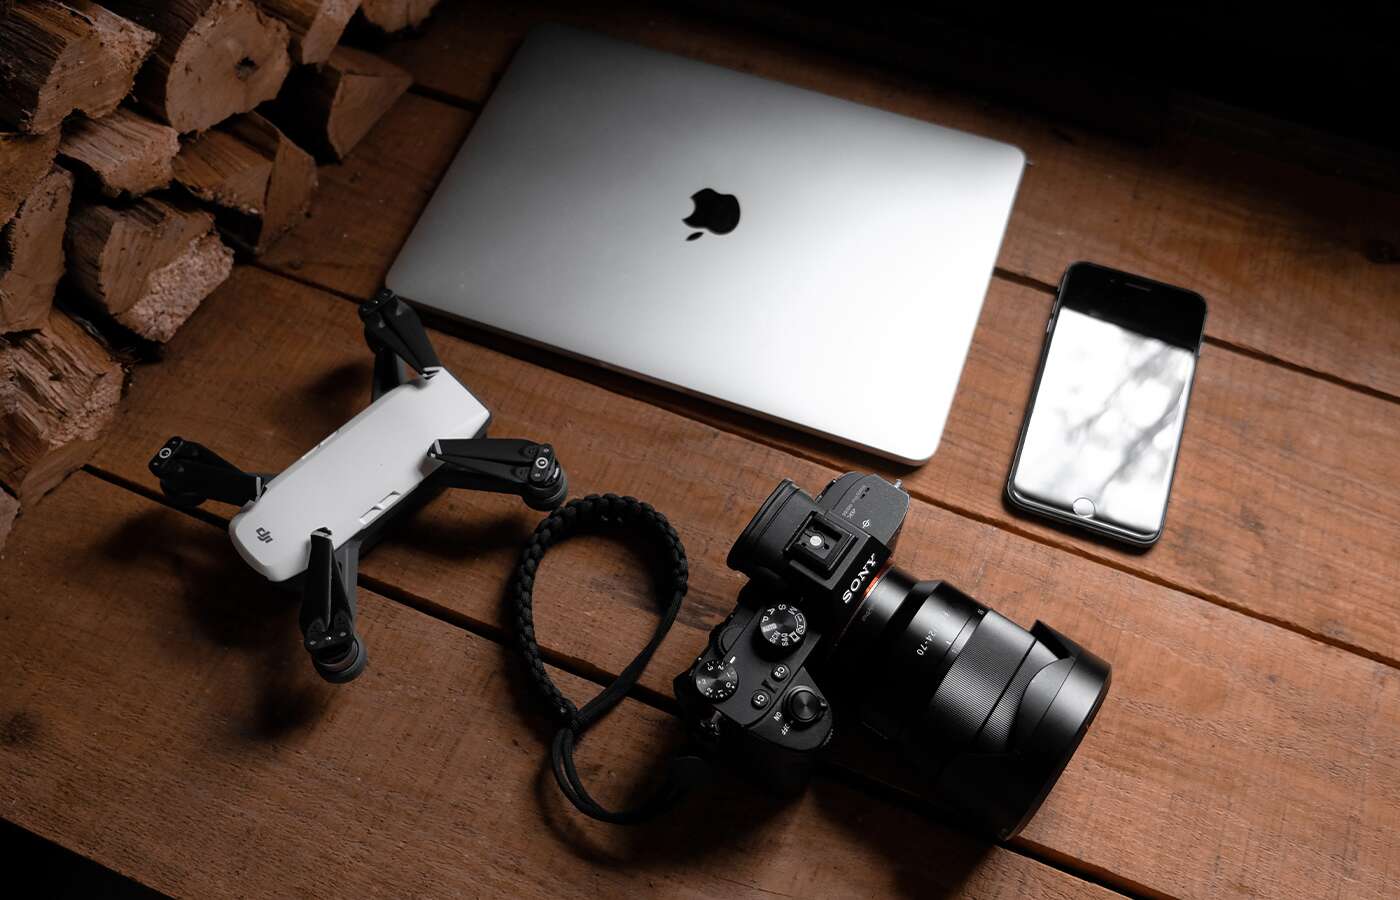
Gone are the days when carrying bulky camera equipment was necessary for capturing high-quality images. With the advanced camera technology embedded in the latest iPhones, you can now travel light while still achieving professional-level photography. The powerful combination of sophisticated hardware and user-friendly software makes your iPhone an ideal companion for documenting the majestic beauty of the safari.
Mastering iPhone Photography Basics
Before delving into the wilderness, familiarize yourself with the basic principles of iPhone photography to maximize your creative potential. Understand the features of your iPhone camera, such as exposure control, focus settings, and the grid overlay. These fundamentals will empower you to compose visually appealing shots, whether you’re capturing a dazzling sunset over the savannah or the intricate patterns of a zebra’s stripes.
Mastering Composition: Setting Grid Lines on Your iPhone for Perfect Rule of Thirds Photography
As an enthusiast in the art of iPhone photography, I’ve discovered that mastering composition is the key to capturing visually appealing and balanced images. One fundamental technique that significantly enhances composition is using grid lines, specifically designed to follow the rule of thirds. In this guide, I’ll walk you through the simple steps of setting up grid lines on your iPhone and show you how to leverage the rule of thirds for more compelling and professional-looking photographs.
Setting Up Grid Lines on Your iPhone:
Access the Camera App: Open your iPhone’s Camera app to get ready to capture stunning shots with enhanced composition.
Access Settings: Tap the “Settings” icon on your iPhone’s home screen. Scroll down until you find the “Camera” option.
Enable Grid: Within the “Camera” settings, locate the “Grid” option. Toggle it to the “On” position. Once activated, grid lines will overlay on your camera screen, providing a visual aid for composing your shots.
Return to Camera: Exit the settings and return to the Camera app. You’ll now see the grid lines superimposed on your camera viewfinder.
Using the Rule of Thirds in Composition:
Now that your grid lines are set, let’s delve into how to effectively use the rule of thirds for composing visually appealing photographs.
Understanding the Rule of Thirds: The rule of thirds divides your image into nine equal parts using two horizontal and two vertical lines. This creates a grid with four intersection points. The rule suggests that placing key elements along these lines or at their intersections creates a more balanced and aesthetically pleasing composition.
Aligning Key Elements: When framing your shot, consider aligning prominent elements, such as the horizon, a prominent tree, or a person, along the grid lines or at the intersecting points. This introduces a sense of balance and guides the viewer’s eyes across the image.
Centering Subjects: Avoid centering your main subject in the middle of the frame. Instead, position it along one of the grid lines or at an intersection point. This asymmetrical placement adds dynamism and interest to your composition.
Balancing Elements: If your scene contains multiple elements, distribute them across the grid to create a balanced composition. For example, if capturing a landscape, position the horizon along one of the horizontal lines and place interesting features at the intersections.
Portrait Photography: When taking portraits, position the subject’s eyes along one of the horizontal lines. This draws attention to the eyes and creates a more engaging and aesthetically pleasing portrait.
Adjusting Composition Dynamically: While adhering to the rule of thirds can result in compelling compositions, don’t be afraid to experiment and adjust dynamically based on the unique characteristics of each scene. The rule serves as a guideline, but breaking it intentionally can lead to creative and captivating photographs.
Elevate Your Photography with Grid Lines and the Rule of Thirds
By setting up grid lines on your iPhone and embracing the rule of thirds in your compositions, you’ll elevate your photography to new heights. These simple yet powerful techniques will help you create images that are not only visually appealing but also resonate with balance and harmony. Experiment with different subjects, scenes, and lighting conditions to discover the full potential of grid lines and the rule of thirds in unleashing your creativity through iPhone photography. Happy shooting!
Setting Focus and Exposure on Your iPhone:
Access the Camera App: Open the Camera app on your iPhone to start the process of setting focus and exposure.
Select Your Subject: Identify the main subject or focal point of your shot. Tap on the screen where your subject is located to initiate the focus and exposure adjustments.
Locking Focus: Once you’ve tapped on your subject, you’ll notice a yellow box or square indicating the focus point. To lock the focus, press and hold on the screen until you see the “AE/AF Lock” notification. This ensures that the focus remains fixed on your chosen subject, even if the scene changes.
Adjusting Exposure: To fine-tune exposure, simply swipe up or down on the screen. Swiping up increases exposure, making the image brighter, while swiping down decreases exposure for a darker effect. This real-time adjustment allows you to adapt to varying lighting conditions on the fly.
AE/AF Lock Reset: If you want to reset the focus and exposure to their automatic settings, tap anywhere on the screen or switch to a different camera mode. This releases the AE/AF (Auto Exposure/Auto Focus) lock and readjusts focus and exposure based on the new framing.
Using Focus and Exposure While Taking Photos:
Now that you’ve set focus and exposure let’s explore how to leverage these settings to enhance your photography:
Selective Focus: Use the focus setting to highlight specific elements in your composition. Whether it’s a portrait, a close-up of a flower, or a distant landscape, tapping on your desired subject ensures that it takes center stage in terms of sharpness and clarity.
Controlling Depth of Field: Adjusting exposure impacts the overall brightness of your image. For scenes with intricate details or contrasting light conditions, controlling exposure helps maintain a balanced and well-exposed photo. Experiment with exposure to achieve the desired mood and emphasize important elements.
Dynamic Lighting Conditions: When shooting in environments with dynamic lighting, such as sunsets or backlit scenes, manually adjusting exposure ensures that your subject is well-lit and retains detail. This is particularly helpful for preserving details in both shadowed and well-lit areas of your composition.
Balancing Elements in Composition: Use focus and exposure to balance different elements within your frame. For instance, if your subject is in the foreground and there’s a vibrant background, adjusting exposure helps maintain a balanced composition without overexposing or underexposing key elements.
Adapting to Changing Environments: When moving through diverse environments, such as from indoors to outdoors, constantly adjusting focus and exposure ensures that your photos maintain optimal clarity and brightness. This adaptability is crucial for capturing seamless moments in various lighting conditions.
Creative Control in Low-Light Situations: In low-light situations, manually adjusting exposure allows for creative control over the atmosphere of your photos. Experiment with different exposure levels to capture the mood and nuances of nighttime scenes without relying solely on the automatic settings.
Elevating Your Photography with Precision Settings
By mastering the art of setting focus and exposure on your iPhone, you gain creative control and precision in your photography. Whether you’re capturing portraits, landscapes, or dynamic scenes, these techniques empower you to produce professional-looking images that stand out. Experiment with these settings in different scenarios, and watch as your iPhone becomes a powerful tool for translating your creative vision into stunning visual narratives.
Unleashing Burst Mode for Action Shots
Life is full of moments that unfold in the blink of an eye, making capturing them a delightful challenge. Enter Burst mode – a feature that allows you to take a rapid series of shots by holding down the shutter button. This is particularly handy for photographing moving animal subjects, ensuring you don’t miss that perfect jump or roar.
Activating Burst Mode on Your iPhone:
Open the Camera App: Begin by launching the Camera app on your iPhone. Ensure you are in photo mode, ready to capture the fast-paced action.
Locate Your Subject: Identify the subject or scene you want to capture in motion. It could be a bird, an elephant, or any dynamic moment where a series of shots would enhance the storytelling.
Hold Down the Shutter Button: Instead of tapping the shutter button, press and hold it down. This activates Burst Mode, and your iPhone will start capturing a rapid sequence of photos for as long as you keep the button pressed.
Viewing Burst Mode Photos: Once you release the shutter button, the burst photos will be saved as a series in your camera roll. To view and select the best shots, open the Photos app, locate the Burst Mode set, and tap “Select” to choose your favorite images.
Making the Most of Burst Mode:
Now that you’ve activated Burst Mode, let’s explore some tips on how to maximize its potential for capturing action-packed photos:
Freeze the Perfect Moment: Burst Mode is perfect for freezing the ideal moment in fast-paced scenes. Capture a series of shots during a crucial moment, ensuring you don’t miss the perfect facial expression, jump, or goal.
Capture Fluid Motion: Use Burst Mode to create a sense of fluidity in your photos, especially when capturing movement. This is particularly effective for activities like an animal moving quickly, sports, or any dynamic scenario where a single shot might not fully convey the motion.
Ideal for Portraits: Burst Mode isn’t just for action shots; it’s also fantastic for capturing a variety of expressions in portrait photography. Use it during candid moments to ensure you have multiple options to choose from, each with a unique and genuine expression.
Focus and Composition: Utilize Burst Mode to experiment with focus and composition. While holding down the shutter button, slightly adjust your framing or focus to create a diverse set of shots. This allows you to choose the most visually appealing composition later.
Eliminate Blinking or Blur: In group photos or portraits, Burst Mode helps eliminate issues like closed eyes or slight motion blur. You can select the frame where everyone has their eyes open and is perfectly still, ensuring a flawless final image.
Create Cinemagraphs: Burst Mode is a fantastic tool for creating cinemagraphs – images with subtle, repeated movements. Capture a series of shots with a consistent element in motion, and later, you can transform them into captivating cinematography using specialized apps.
Action Sequence Collages: Combine Burst Mode photos to create action sequence collages. This is a creative way to showcase the progression of an activity or event, providing a dynamic visual narrative in a single frame.
Propel your photography to the next level
Burst Mode on your iPhone opens up a world of possibilities for capturing dynamic and captivating photos. Whether you’re documenting sports events, playful moments of elephants, or creating unique portraits, this feature empowers you to freeze time and express the energy of the moment. Activate Burst Mode, experiment with its capabilities, and watch as your iPhone becomes a powerful tool for capturing the essence of fast-paced action in stunning detail.
Perfect Portraits: A Step-by-Step Guide to Activating and Using Portrait Mode on Your iPhone
I’ve discovered the transformative capabilities of Portrait Mode for capturing stunning, professional-looking portraits. This feature elevates your photography by adding a beautiful depth-of-field effect to your images, effortlessly highlighting your subject against a softly blurred background. In this guide, I’ll walk you through the simple steps of activating Portrait Mode on your iPhone and share tips on how to maximize its potential for creating captivating portraits.
Activating Portrait Mode on Your iPhone:
Open the Camera App: Begin by launching the Camera app on your iPhone. Ensure you are in photo mode and ready to capture a portrait.
Select Portrait Mode: Swipe left on the camera modes located at the bottom of the screen until you reach “Portrait.” This mode is identifiable by an icon featuring a person.
Choose Your Subject: Identify the person or object you want to photograph. Portrait Mode works best when capturing a single subject, providing a stunning focus effect.
Adjust Composition: Position your subject within the frame, keeping in mind the desired composition. Portrait Mode is excellent for highlighting facial features and creating a visually pleasing background blur.
Capture the Photo: Once your subject is ready, tap the shutter button to capture the photo. Your iPhone will utilize its dual or triple camera system (depending on the model) to create a sophisticated depth effect.
Maximizing Portrait Mode for Striking Photos:
Now that you’ve activated Portrait Mode, let’s explore tips on how to make the most of this feature for creating impactful portraits:
Optimal Distance: Maintain an optimal distance from your subject. Portrait Mode works best when the subject is within 8 feet (2.4 meters) from the camera. This ensures that depth-sensing technology can effectively distinguish between the subject and the background.
Good Lighting Conditions: Portrait Mode thrives in well-lit environments. Whenever possible, capture portraits in natural light or well-lit settings to enhance the clarity of facial features and the background blur.
Experiment with Portrait Lighting: Explore the various Portrait Lighting options available within Portrait Mode. These settings, including Natural Light, Studio Light, and Contour Light, allow you to customize the lighting style for a flattering and professional look.
Consider the Background: Pay attention to the background when composing your shot. Portrait Mode beautifully blurs the background, but interesting textures or colors can add an artistic touch to your portraits. Experiment with different backgrounds to find what complements your subject.
Utilize the Telephoto Lens: If your iPhone model is equipped with a telephoto lens, use it in Portrait Mode for a more pronounced depth effect. This is particularly effective when capturing close-up shots of your subject.
Capture Expressive Poses: Encourage your subjects to express themselves and experiment with different poses. Portrait Mode excels in highlighting facial expressions, making it ideal for capturing a range of emotions and personalities.
Edit and Enhance: After capturing your portraits, leverage the editing tools available on your iPhone to fine-tune the results. Adjusting brightness, and contrast, and applying subtle filters can enhance the overall impact of your portrait.
Step Up Your Portraiture with Ease
Portrait Mode on your iPhone is a powerful tool for creating visually stunning portraits with a professional touch. By following these simple steps and experimenting with different settings, you’ll unlock the full potential of this feature and capture portraits that stand out. Whether you’re photographing friends, family, or even yourself, Portrait Mode adds a touch of elegance and artistry to your iPhone photography. Activate Portrait Mode, unleash your creativity, and watch as your portraits come to life with depth and sophistication. Happy capturing!
Being a passionate iPhone photographer, I’ve delved into the incredible world of Night Mode – a revolutionary feature that allows you to capture stunning low-light photos with exceptional clarity and detail. In this guide, I’ll walk you through the steps to activate Night Mode on your iPhone and share valuable tips on making the most of this feature for capturing breathtaking night scenes.
Activating Night Mode on Your iPhone:
Open the Camera App: Launch the Camera app on your iPhone. Ensure you are in photo mode and ready to capture the enchanting beauty of the night.
Automatic Activation: Night Mode on recent iPhone models automatically activates when the camera detects low-light conditions. Look for the Night Mode icon, usually displayed as a crescent moon, on the screen. If the icon is yellow, Night Mode is active.
Manually Enable Night Mode: For more control over Night Mode, tap on the Night Mode icon to manually enable or disable it. Adjust the slider that appears to set the duration for which Night Mode will capture light, ranging from a few seconds to several seconds.
Stabilize Your iPhone: Night Mode requires a stable shot to capture optimal details in low light. Use a tripod or find a stable surface to rest your iPhone. The longer exposure time in Night Mode enhances the chance of capturing beautifully illuminated scenes.
Mastering Night Mode Photography:
Now that you’ve activated Night Mode, let’s explore tips on how to capture mesmerizing night photos with your iPhone:
Embrace the Darkness: Night Mode excels in low-light conditions, so don’t shy away from embracing the darkness. Allow the feature to work its magic by capturing scenes that come to life when illuminated by the soft glow of ambient light.
Experiment with Exposure Times: Adjust the Night Mode slider to experiment with exposure times. Longer exposures are ideal for static scenes, while shorter exposures can capture moving subjects with greater clarity. Find the right balance based on the dynamics of your night setting.
Capture Cityscapes and Landscapes: Night Mode is perfect for capturing the magical glow of cityscapes and landscapes after dark. Experiment with capturing city lights, urban skylines, or natural landscapes under the starry sky to reveal a world of nocturnal beauty.
Avoid Overexposure: While Night Mode enhances low-light scenes, be mindful of potential overexposure, especially with bright light sources. Adjust the exposure manually if needed, or use the automatic feature to let your iPhone optimize the settings for you.
Use a Tripod or Stable Surface: Night Mode benefits from a stable shooting platform. If possible, use a tripod to keep your iPhone steady. If a tripod isn’t available, find a stable surface to rest your device for clear and sharp shots.
Experiment with Subjects: Night Mode isn’t limited to landscapes; it’s equally effective for capturing portraits, still life, or any subject bathed in low light. Experiment with different compositions and subjects to discover the versatility of Night Mode.
Capture Nighttime Activities: Document nighttime activities, events, or gatherings with Night Mode. Whether it’s a festive celebration, a quiet dinner, or a night on the town, Night Mode adds a touch of cinematic beauty to your nighttime memories.
Post-Processing Touches: After capturing your night photos, explore the editing tools on your iPhone to fine-tune the results. Adjusting brightness, and contrast, and applying subtle filters can enhance the atmospheric quality of your night shots.
Unveiling the Night’s Elegance with Your iPhone
Night Mode on your iPhone is a remarkable tool for transforming the darkness into a canvas of captivating imagery. By activating Night Mode and applying these tips, you’ll unlock the potential to capture stunning, low-light photographs that showcase the magic of the night. Whether you’re exploring city streets, capturing landscapes, or documenting nighttime events, Night Mode elevates your iPhone photography to new heights. Activate Night Mode, embrace the allure of the night, and witness the enchantment unfold through your lens. Happy night capturing!
Living in the Moment: A Guide to Setting and Capturing Live Photos on Your iPhone
I’ve discovered the joy of bringing photos to life with the Live Photos feature. This incredible feature captures a few seconds of motion and sound, turning your static images into dynamic memories. In this section, I’ll walk you through the simple steps of activating Live Mode on your iPhone and share some creative tips on making the most of this feature for capturing unforgettable moments.
Activating Live Mode on Your iPhone:
Open the Camera App: Begin by launching the Camera app on your iPhone. Ensure you are in photo mode and ready to capture the spontaneity of live moments.
Locate the Live Photos Icon: Look for the Live Photos icon, usually represented by concentric circles at the top of the camera interface. If the icon is yellow, Live Mode is active.
Enable Live Mode: If the Live Photos icon is not yellow, tap on it to activate Live Mode. Once enabled, your iPhone will capture a brief video clip before and after you press the shutter button.
Take the Live Photo: Now that Live Mode is activated, press the shutter button to capture your live photo. Remember to hold your iPhone steady for a few moments to ensure a smooth transition between the captured frames.
Creative Tips for Using Live Mode:
Now that you’ve activated Live Mode, let’s explore some creative ways to make your live photos truly come alive:
Capture Candid Moments: Live Mode is perfect for preserving candid moments. Whether it’s a genuine smile, a playful interaction, or a spontaneous event, Live Mode adds an extra layer of authenticity to your captures.
Create Dynamic Portraits: Use Live Mode to add dynamism to your portraits. Encourage your subjects to move slightly or strike a pose, and let Live Mode capture the essence of their personality in a short, animated clip.
Explore Nature in Motion: When photographing nature, especially flowing water, rustling leaves, or moving clouds, Live Mode allows you to showcase the dynamic beauty of these elements. Capture the subtle movements that add life to your outdoor scenes.
Animate Inanimate Objects: Bring still objects to life with Live Mode. Whether it’s a flickering candle, a swaying tree branch, or a dancing flame, Live Mode adds a touch of movement that transforms the mundane into the mesmerizing.
Tell a Story with Sound: Live Photos also capture sound, allowing you to relive the moment with its ambient sounds. Consider the background noises, laughter, or subtle sounds that contribute to the atmosphere, enhancing the storytelling aspect of your photos.
Edit and Share: After capturing your live photos, explore the editing tools on your iPhone to trim or adjust the frames. You can also choose a specific frame as the main photo. Once satisfied, share your dynamic creations with friends and family.
Compatible Apps and Platforms: Share your Live Photos on platforms like Instagram or Facebook or messaging apps that support this feature. The dynamic nature of Live Photos adds an engaging element to your posts and messages.
Long-Press for Animation: On your iPhone or other Apple devices, a long-press on a Live Photo animates the sequence, allowing you to relive the moment right from your camera roll. Share this interactive experience with others to evoke a sense of nostalgia.
Infusing Life into Your Photography
Live Mode on your iPhone opens up a world of possibilities for capturing dynamic and engaging moments. Activate Live Mode, experiment with different subjects and scenes, and watch as your photos come alive with motion and sound. Whether you’re documenting everyday life, special occasions, or the beauty of nature, Live Mode adds a unique and immersive dimension to your iPhone photography.
Loop Mode: Creating Mesmerizing Video Loops
Loop Mode takes the concept of Live Mode a step further, transforming a Live Photo into a mesmerizing video loop. This feature seamlessly repeats the captured motion, creating a continuous, hypnotic visual experience. Whether it’s a friend’s laughter, a playful pet, or the rhythmic motion of waves, Loop Mode elevates these moments into captivating, shareable loops. It’s the perfect tool for turning snippets of life into compelling, repeatable narratives that draw viewers into the heart of the scene.
Bounce Mode: Adding a Playful Twist to Memories
Bounce Mode introduces an element of playfulness to the iPhone camera, offering a unique take on the traditional boomerang-style videos. When activated, this mode plays the captured Live Photo in a continuous loop, first forward and then in reverse – creating a delightful bounce effect. It’s a whimsical feature that turns ordinary actions into captivating, whimsical sequences. Bounce Mode has become my go-to for adding a touch of lightheartedness to memories, whether it’s a celebratory dance or a friend’s amusing gesture.
Painting with Light: Unleashing Long Exposure Magic on Your iPhone
I’ve ventured into the enchanting realm of Long Exposure mode, a feature that transforms ordinary scenes into captivating works of art. Long Exposure allows you to capture the passage of time, emphasizing motion, light trails, and dynamic elements in your photos. In this guide, I’ll walk you through the steps of activating Long Exposure mode on your iPhone and share creative tips on mastering this feature for extraordinary photography.
Activating Long Exposure Mode on Your iPhone:
Open the Camera App: Begin by launching the Camera app on your iPhone. Ensure you are in photo mode, ready to explore the wonders of Long Exposure.
Locate the Long Exposure Option: Look for the Long Exposure option, typically represented by a series of overlapping circles or trails. This icon indicates the availability of Long Exposure mode.
Set Your Shot: Identify the scene you want to capture with the ethereal effects of Long Exposure. This could include flowing water, moving traffic, or any scenario where capturing motion over time adds visual interest.
Tap and Hold the Shutter Button: To activate Long Exposure, tap and hold the shutter button. This initiates the extended exposure time, allowing your iPhone to capture a sequence of frames over several seconds.
Stabilize Your iPhone: Long Exposure requires stability to avoid unwanted blurring. Use a tripod or find a stable surface to rest your iPhone during the capture. This ensures a clear and mesmerizing long-exposure effect.
Mastering Long Exposure Photography:
Now that Long Exposure mode is activated, let’s explore creative ways to use this feature for stunning and dynamic photos:
Flowing Water Landscapes: Long Exposure is perfect for capturing the silky, flowing effect of water in rivers, waterfalls, or oceans. Set up your shot, activate Long Exposure, and watch as the water transforms into a dreamy, artistic flow.
Light Trails in Urban Scenes: Capture the vibrant energy of city life by photographing light trails from moving vehicles. Long Exposure beautifully paints streaks of light, creating a mesmerizing blend of colors against the urban backdrop.
Star Trails and Nightscapes: Use Long Exposure to capture the movement of stars across the night sky. This technique is particularly effective in rural or dark locations, allowing you to create stunning star trail photos and captivating nightscapes.
Dynamic Cloud Formations: Long Exposure isn’t limited to capturing motion on the ground. Experiment with capturing dynamic cloud formations, emphasizing the movement and drama in the sky for a unique and atmospheric effect.
Play with Light Painting: Explore the artistic realm of light painting with Long Exposure. Use flashlights, LED lights, or even sparklers to draw and paint with light during the extended exposure time, resulting in visually striking and abstract compositions.
Traffic Blur in Urban Environments: Long Exposure is ideal for creating the classic traffic blur effect in urban environments. Set up your shot overlooking a busy street, activate Long Exposure, and witness the dynamic trails left by moving vehicles.
Fireworks and Celebrations: Capture the magic of fireworks displays or celebratory events using Long Exposure. This technique transforms exploding bursts of light into stunning patterns, adding an extra layer of awe to your festive photos.
Editing and Refining: After capturing your Long Exposure photos, explore the editing tools on your iPhone to fine-tune and enhance the results. Adjusting brightness, and contrast, and applying filters can further elevate the impact of your long-exposure masterpieces.
Crafting Visual Poetry with Long Exposure
Long Exposure mode on your iPhone is a gateway to crafting visual poetry in your photography. Activate this feature, experiment with different subjects and scenes, and watch as your ordinary surroundings transform into extraordinary works of art. Whether you’re capturing the flow of water, the buzz of a city, or the magic of a starry night, Long Exposure adds a dynamic and mesmerizing touch to your iPhone photography. Activate Long Exposure, explore its creative possibilities, and embark on a visual journey filled with captivating motion and light.
Exploring the Synergy of Modes
What truly sets the iPhone camera apart is the ability to seamlessly combine these modes to unlock new dimensions of creativity. Live Mode can be coupled with Loop Mode to extend the captured moment into a continuous visual story, while Bounce Mode adds an extra layer of dynamism to Looped sequences. Long Exposure Mode, on the other hand, invites me to experiment with time and motion, creating ethereal scenes that defy the limitations of traditional photography.
As a passionate iPhone photographer, I’ve discovered that Live Mode is more than just a feature – it’s a dynamic tool that adds a new dimension to my photography. Here are 10 compelling reasons why shooting in Live Mode on my iPhone has become an integral part of my creative process, allowing me to capture moments in a way that goes beyond static images.
Capturing the Essence of Motion: Live Mode’s ability to record a few seconds before and after pressing the shutter button enables me to capture the essence of motion in a way that a still photo can’t. Whether it’s the wind rustling through leaves, a friend’s spontaneous laughter, or the playfulness of a pet, Live Mode preserves the dynamic nature of the moment.
Reliving Candid Moments: The beauty of Live Mode lies in its ability to transport me back to the exact moment when a photo was taken. Tapping and holding on a Live Photo allows me to relive the candid expressions, fleeting gestures, and unscripted emotions that might have gone unnoticed in a static image.
Creating Personal Time Capsules: Live Mode acts as a personal time capsule, encapsulating the sights and sounds of a specific moment. Whether it’s a family gathering, a day at the beach, or a spontaneous adventure, these mini-movies become cherished snippets of time that I can revisit and share with others.
Adding Depth to Still Shots: Live Mode not only captures motion but also adds depth to still shots. The subtle movement in the background or the fluttering of leaves brings a sense of dimensionality to the image, making it more immersive and engaging for viewers.
Expressing Emotion through Movement: Some moments are best expressed through movement. Live Mode allows me to convey the emotion and energy of a scene, whether it’s the joy of a dance, the excitement of a celebration, or the tranquility of a flowing stream. The added layer of motion enhances the storytelling aspect of my photography.
Perfecting the Decisive Moment: Henri Cartier-Bresson’s concept of the “decisive moment” is beautifully captured with Live Mode. It provides the opportunity to fine-tune the exact moment I want to preserve, ensuring that the nuances of emotion, expression, and movement align perfectly in a single frame.
Experimenting with Cinematic Shots: Live Mode empowers me to experiment with creating cinematic shots on my iPhone. By combining the captured video snippet with thoughtful editing, I can transform ordinary scenes into visually compelling cinematic sequences that rival the storytelling prowess of larger video productions.
Enhancing Portrait Photography: When shooting portraits, Live Mode allows me to go beyond the static pose. The subtle movements and expressions captured in the brief video clip add a layer of authenticity to portrait photography, showcasing the subject’s personality and bringing the image to life.
Creating Visually Engaging Memories: Memories are more than just frozen moments – they encompass the atmosphere, sounds, and emotions of a particular time. Live Mode transforms my memories into visually engaging stories, preserving the ambiance and mood that make each moment special.
Engaging Viewers on Social Media: In a world saturated with static images, live-mode content stands out on social media platforms. The auto-play feature on platforms like Instagram allows viewers to experience a snippet of the captured moment without actively engaging with the content, making my photos more likely to catch their attention.
Shooting in Live Mode on my iPhone has revolutionized the way I approach photography. It’s not just about freezing moments but about capturing the living, breathing essence of those moments. Each Live Photo becomes a unique blend of emotion, motion, and atmosphere, turning my iPhone into a storytelling device that goes beyond traditional photography. As I continue to explore and push the boundaries of this feature, I find that my visual storytelling evolves, allowing me to share the world around me in a more immersive and captivating way.
Navigating the Wild: Unraveling the Limitations of Using an iPhone on an African Safari
Embarking on an African safari is a thrilling adventure, an immersive experience where nature unfolds in all its untamed glory. As an avid traveler who has traversed the vast landscapes of Africa, I’ve come to appreciate the limitations of using an iPhone as my primary device in the heart of the wilderness. While the iPhone is a powerful tool for capturing moments, its inherent constraints become apparent in the rugged terrains and diverse conditions of an African safari.
1. Limited Zoom Capability:
One of the primary limitations of an iPhone on Safari is its limited optical zoom capability. While newer models have improved digital zoom features, they pale in comparison to dedicated cameras with powerful telephoto lenses. This restriction becomes evident when attempting to capture distant wildlife or intricate details that are integral to the safari experience.
2. Challenges in Low-Light Conditions:
African safaris often offer unique opportunities to witness wildlife during dawn or dusk, commonly known as the golden hours. While the iPhone excels in well-lit environments, its performance can be challenging in low-light conditions. The limitations become apparent when trying to capture the majestic silhouettes of wildlife against the dramatic African sunset or sunrise.
3. Vulnerability to Harsh Environmental Elements:
The rugged landscapes of Africa can subject electronic devices to harsh conditions, including dust, heat, and sudden weather changes. While newer iPhone models boast water and dust resistance, the extent to which they can withstand the extreme conditions of an African safari may fall short, necessitating extra caution and protective measures.
4. Limited Battery Life:
Extended periods in the wilderness without access to charging facilities pose a challenge to the iPhone’s battery life. The power-hungry nature of photography, navigation, and other safari-related apps can quickly deplete the battery, leaving users with the dilemma of conserving power for essential communication or sacrificing capturing precious moments.
5. Variable Connectivity Challenges:
While some safari lodges and camps provide limited connectivity, venturing into more remote areas often results in a lack of cellular service. This can impede the real-time sharing of experiences, navigation using maps, and accessing safari-related apps that rely on a stable internet connection.
6. Limited Storage Capacity:
The breathtaking scenery, diverse wildlife, and dynamic landscapes of an African safari inspire prolific photography. However, the limited storage capacity of an iPhone may pose a challenge, especially for those who wish to capture every moment. Running out of storage space necessitates the constant management of files, potentially leading to missed opportunities or the need for additional storage solutions.
7. Inability to Shoot in RAW Format:
For enthusiasts who crave extensive post-processing flexibility, the older iPhone’s inability to capture images in RAW format can be limiting. Dedicated cameras offer this feature, allowing for more detailed editing and adjustments after the photo has been taken.
8. Limited Manual Control Options:
Photography enthusiasts who prefer manual control over settings may find the iPhone’s limited options restrictive. Dedicated cameras often offer a broader range of manual adjustments, catering to those who want to fine-tune their photography in challenging safari conditions.
9. Less Effective Image Stabilization:
Capturing wildlife often involves moments of spontaneity, with little time for setting up tripods or stabilizing equipment. While the iPhone incorporates image stabilization technology, it may not be as effective as the dedicated mechanisms found in professional cameras, leading to potential blurriness in fast-paced wildlife shots.
10. Challenges in Telephoto Photography:
For wildlife enthusiasts seeking to capture the intricacies of African fauna, the iPhone’s limitations in telephoto photography may be a drawback. Dedicated cameras with powerful telephoto lenses offer greater reach, allowing users to photograph distant subjects with enhanced clarity.
In conclusion, while the iPhone is a remarkable device with powerful capabilities, its limitations become apparent in the unique and demanding conditions of an African safari. Travelers must carefully consider these constraints and weigh the advantages of portability and convenience against the desire for specialized photographic features. Despite these limitations, leveraging the iPhone intelligently and supplementing its use with other dedicated devices can still result in capturing the awe-inspiring beauty of Africa’s wildlife and landscapes. To learn more, read The Complete Guide To Safari Photography


